Impulse Response is an ‘effect’ that we recommend to every musician who wants to achieve an ‘acoustic’ sound with their electric instrument. We’ve received countless e-mails from violin players asking us how to get a very authentic acoustic sound with an electric violin. Here are all the things you can do to achieve that sound with any instrument.
What is an Impulse Response?
To put it in layman’s terms, it’s a small audio file that can be added to a multi-effects device, or any other device capable of supporting an Impulse Response, in order to accurately simulate the sound of loudspeakers, a legendary tube amplifier, an effects chain or a room with a particular resonance.
In simple terms, IR is an acoustic measurement of the sound produced by one or more elements (instrument, amplifier, microphone, room, etc.), that has been captured and then compiled into a digital file.
During the capturing of the IR, dozens of parameters come into play, including the spatial positioning of each element or the dimensions of the very space in which you will be playing. Every element has an influence in the captured sound!
What is an IR file?
An Impulse Response file is a computer file, generally in WAV format or other forms of proprietary format. It is therefore an audio file that you can play back with an audio player software. If you listen to it, you will hear a rather short muffled sound. Its sound wave should be similar to something like this.

Multi-effects, pedals or sound editing software will use this little file to replicate the acoustics of one or more elements: amplifier, sound box, room reverb, etc.
We won’t go into the scientific details, but you should know that the analysis that allows us to generate an IR is based on the work of Joseph Fourier, a mathematician and physicist, and his famous Fourier transform. It is very likely that you heard about it in school if you had advanced physics classes! There is a whole series of calculations that go into generating an Impulse Response. If you are curious and not afraid of numbers, you should visit the Wikipedia page dedicated to it.
What is Impulse Response used for in the field of music?
To replicate the sound of devices or the acoustics of a particular place
In the music world, Impulse Response is widely used by guitarists. For instance, it allows to simulate the sound produced by amplifiers and loudspeakers that are well known, but not easily affordable, or no longer available.
We often see effects units that come with 150 amp models, 50 speaker models, 20 models of the most popular microphones with a variety of positioning options, or even 35 models of legendary effects pedals! All these models are made by creating an Impulse Response file in a particular environment or environments!
The result is that the guitarist is able to replicate the sound of the amplifier that Jimmy Hendrix used on a particular tour, except that he doesn’t have to buy that amp. All he has to do is use the amp’s model on his multi-effects unit. These legendary amps, speakers and pedals can be used on any instrument.
To replicate the acoustics of a sound box on an electric instrument
Impulse Response is not limited to replicating the sound of a particular device or place. It is also a valuable tool for replicating the sound of an acoustic instrument with an electric instrument.
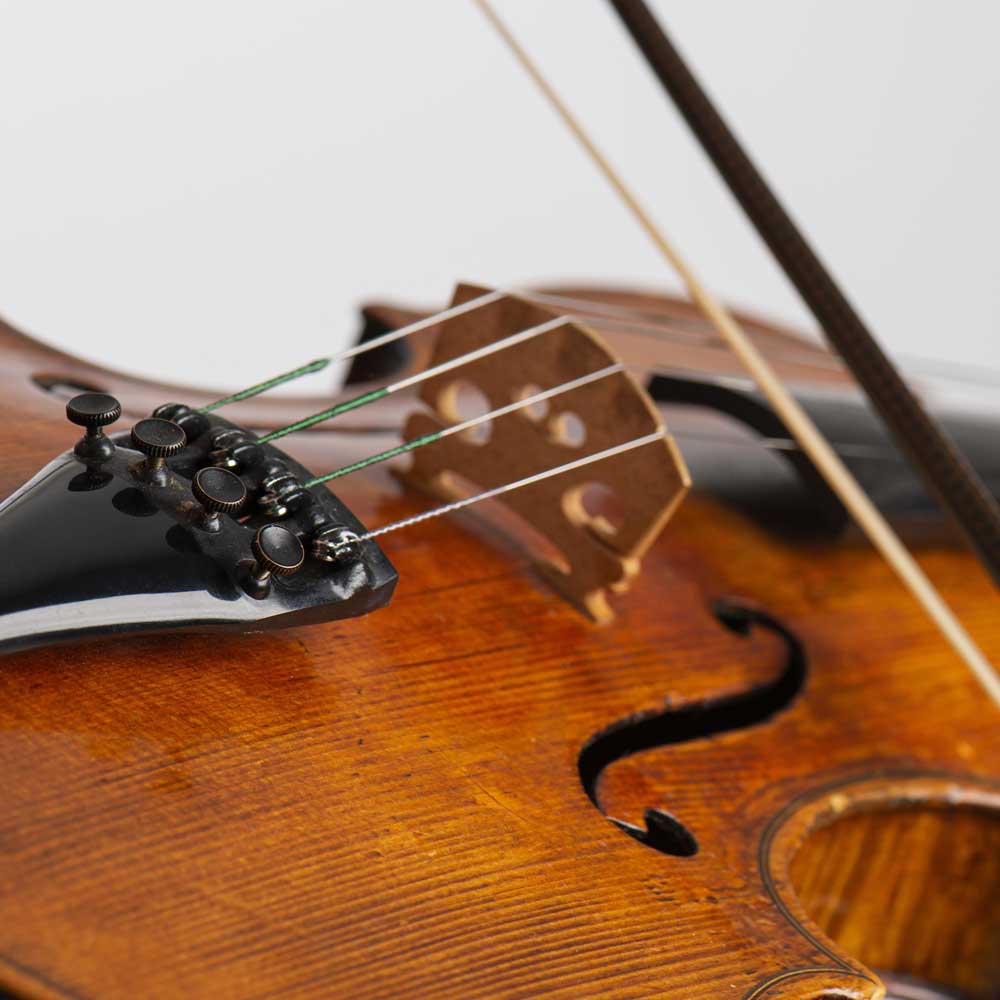
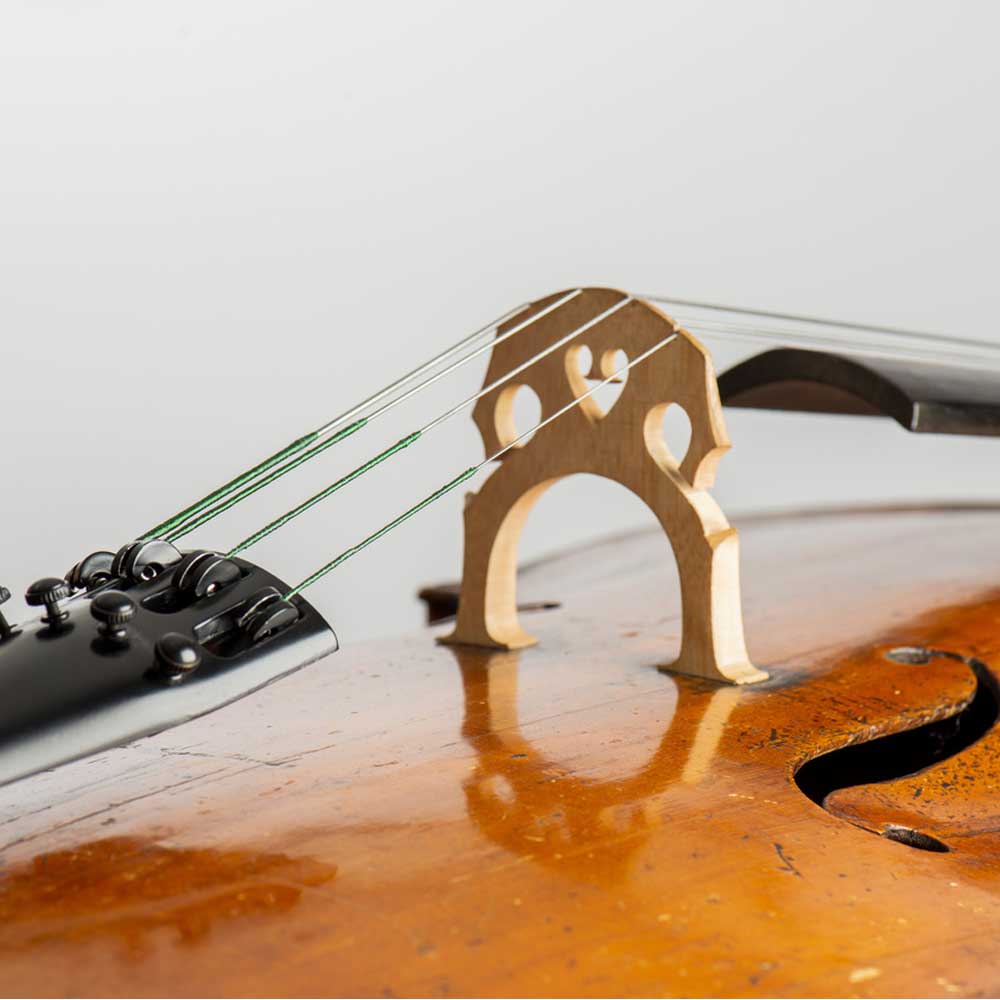
Thanks to an IR file, it is possible to replicate the sound of an acoustic violin, or an acoustic cello with its electric equivalent! Yes, yes, you read that right: by using an IR file of a classical violin, you will be able to recreate the acoustic sound of that instrument!
Obviously, an electric violin will not sound like a classical violin. Their structures are far too different and the absence of a sound box reduces the pure acoustic possibilities of the electric instrument. We have explained all the differences between an electric and an acoustic violin in a dedicated article that we kindly invite you to read. These structural differences between an acoustic and an electric instrument apply to any instrument having a sound box.
It is possible to achieve a similar sound to that of a classical violin by adding a little delay and reverb, but the pure acoustics of the instrument will still be missing. That distinctive sound of the sound waves emanating from an acoustic instrument and traveling through the air inside the sound box before being perceived by a microphone or by your ears.
With an IR file, you can replicate these acoustics. These Impulse Response files work for any instrument with a sound box: violin, viola, acoustic guitar, ukulele, cello, etc. Quite frankly, you will be blown away by the use of an IR file with your electric instrument! It is currently the best way to come as close as possible to an acoustic sound.
Without further ado, here is a video that compares several sound recordings of the same electric violin in identical conditions, but with and without the use of an Impulse Response file and with and without the use of a slight reverb. You will hear consecutively in the following listening order:
- The dry sound of the electric violin without any effects
- The dry sound with only an acoutic violin IR that has been integrated into the Hotone Ampero
- And lastly, the dry sound with an acoutic violin IR + a slight reverb
We replicated this test in 3 different recordings that appear one after the other in the video. We used a 4-string Line electric violin and an Ampero processor. The result is truly surprising! The use of an IR file literally transforms the dry sound of the electric violin.
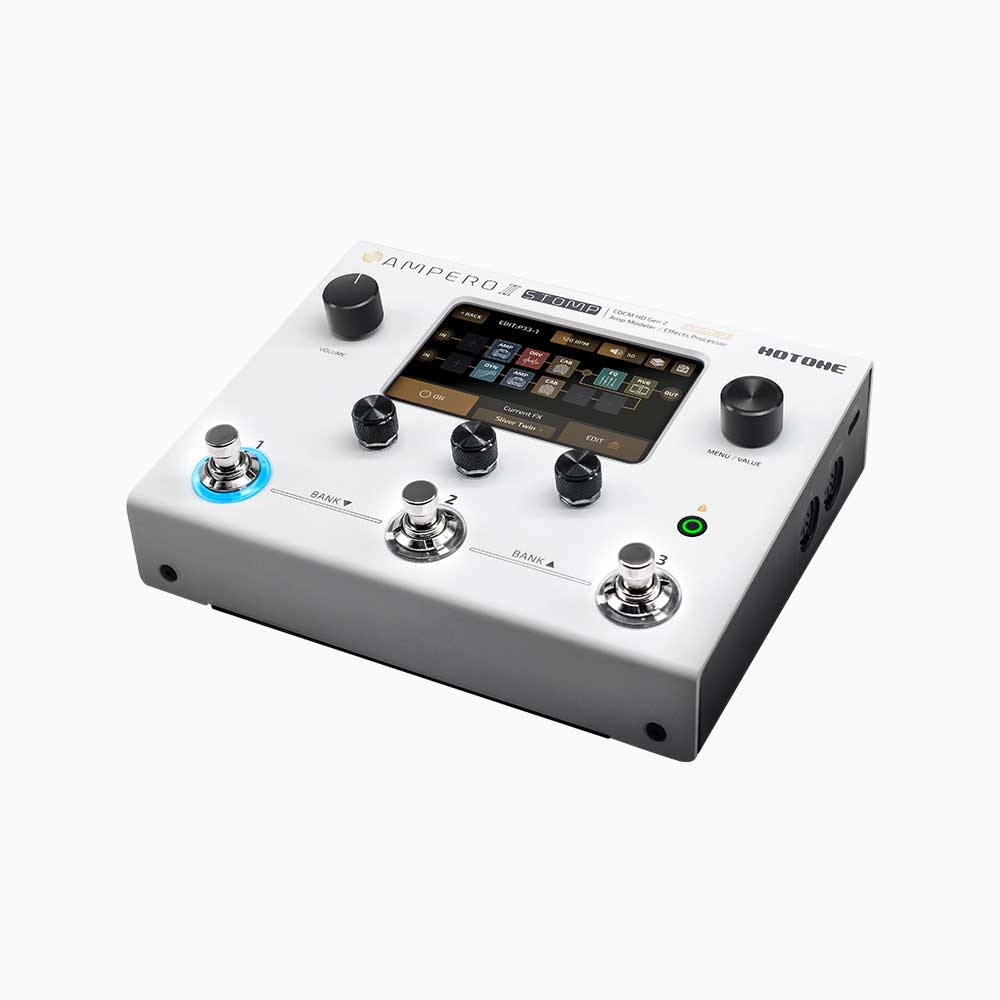
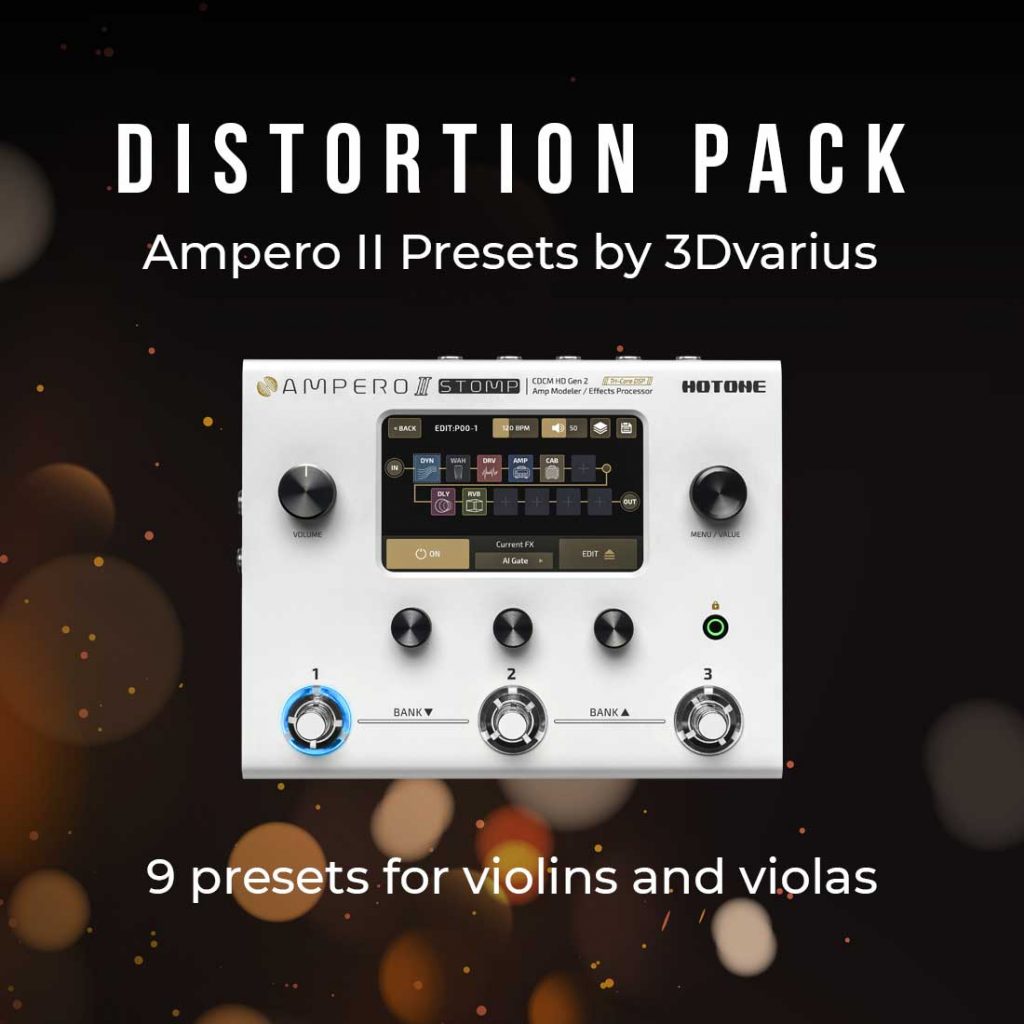
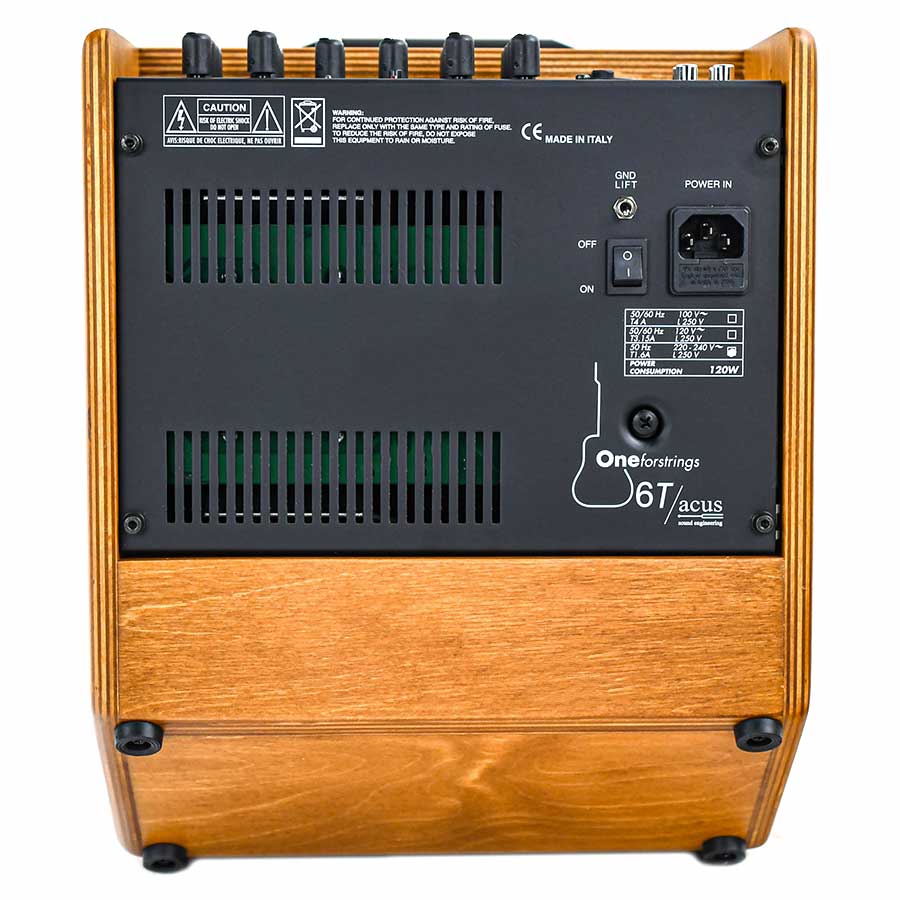
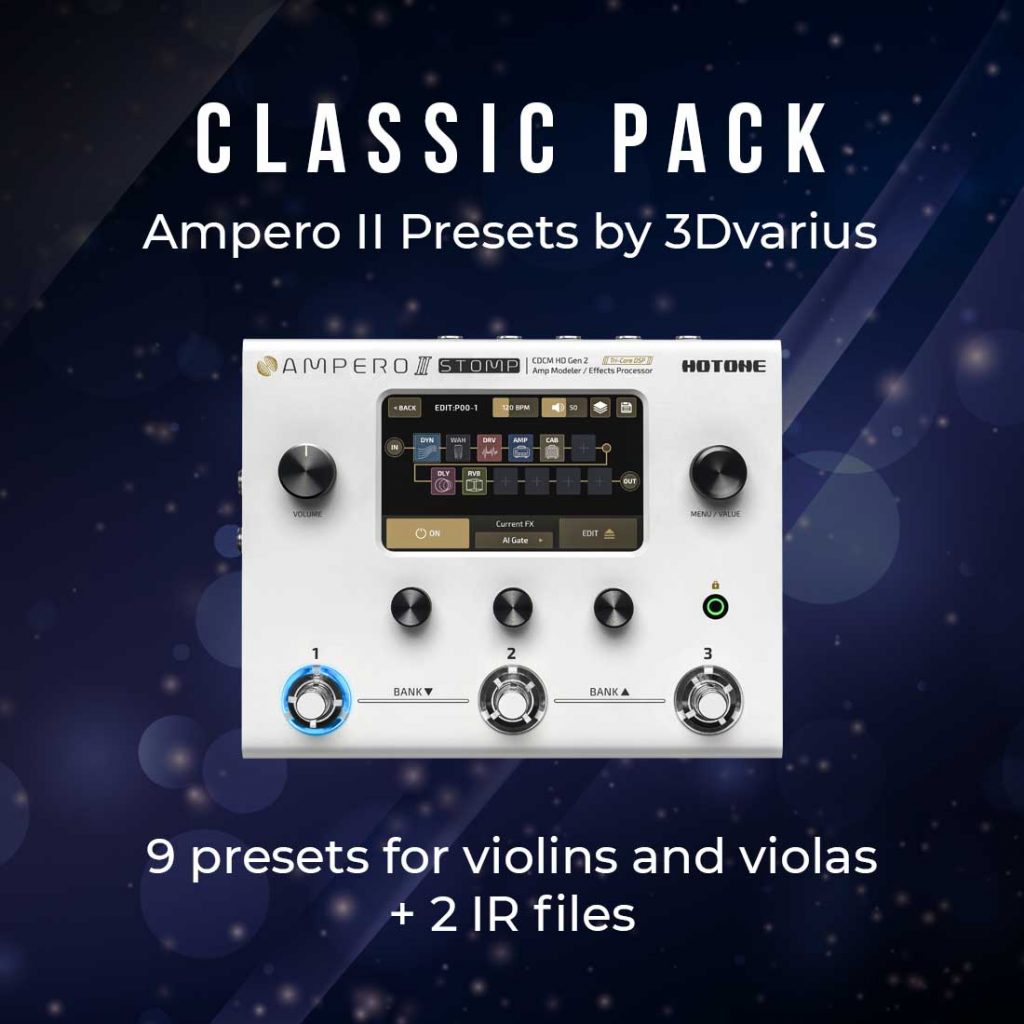
We have added Impulse Responses to the Hotone Ampero and the Ampero II Stomp. They allow you to replicate the sounds of a variety of violins and violas. The Hotone Ampero and the Ampero II Stomp, available on our website, now include several pre-installed effects that have been specifically customized for violins and violas.
To replicate the sound of an acoustic instrument using a piezo amplification system
Impulse Response is generally used in the electric instrument world. However, it is perfectly possible to use an IR with an acoustic instrument. Let’s take a look at what you can do with it!
The trouble with amplifying acoustic instruments such as classical violins or cellos is that most of the existing and effective amplification solutions on stage are piezo pickup systems. This type of amplification is almost equivalent to the one we use on our electric violins. However, it is less precise because it has a single pickup for the whole instrument, whereas our electric violins are equipped with one pickup per string.
Unfortunately, these systems do not capture the pure acoustics of the instrument. They transcribe the vibrations into an electrical signal. The use of an Impulse Response file can improve the sound produced by that pickup. Piezo pickup systems for acoustic instruments produce a more direct and less warm sound because the so-called “air reverberation” produced by the sound box of the violin, viola or any other instrument equipped with a sound box, disappears. But if you use an IR file based on your own classical violin, you will be able to obtain the acoustics of your violin with a piezo pickup system. It is thus possible to achieve the sound of a classical violin with a piezo pickup system at the end of the signal chain through the use of an IR file.
To replicate the sound of a legendary instrument such as a Stradivarius
If you’ve been dreaming for ages of being able to recreate the exact sound of a Stradivarius with your violin for a studio recording or an amplified concert, you can probably do it. However, you will still need to find an IR file of a Stradivarius… 🙂
But the principle is the same. If you have an IR file of a Stradivarius, you will be able to replicate its acoustics using any kind of amplification system. But remember, we are talking about the sound that will be produced at the end of the signal chain. In other words, it is the sound produced after the pickup of your violin, and therefore audible through a sound system (such as an amp). Of course, the sound produced by the sound box of your classical violin will not change in any way…
What sort of equipment should I use for Impulse Response?
You need an interface that can interpret an Impulse Response file. This could be a multi-effects processor, an effects pedal or any audio production software such as ProTools or Cubase for example.
Multi-effects processors
Most multi-effects processors today have built-in Impulse Response libraries and allow you to upload your own IRs to the device. Such is the case with the Hotone Ampero and the Hotone Ampero II Stomp, two models available in our store that include effects for violins and violas. With this kind of processors, you will be able to download IR files thanks to the manufacturer’s software.
The libraries provided by the manufacturers are usually IR files from the most famous amplifiers, specific effect pedals or well-known guitar acoustics. Almost all of them are intended for guitar and bass players.
Full descriptions of multi-effects processors always include a list of the available models that the processor offers. Most of the time, we find models for:
- Amps and speakers
- Microphones in a variety of positions
- Pedal models
- Guitar or bass acoustic simulations
As usual, if you want to replicate the sound of a classical violin, viola, cello or double bass, you have to get your hands dirty 🙂
First, you need to find or create one or more IR files and then integrate them into your multi-effects unit. There are royalty-free IR files that can be downloaded from the Internet, or purchased from one of the many sites specializing in Impulse Response. Watch out for files using a proprietary format! They are often only recognized by the devices of a given manufacturer.
Secondly, you need to download the file into your effects processor and then integrate it into a new effects chain. In the following video, The Pedal Guy explains how to integrate and use Impulse Response with an Ampero processor.
Small effect pedals
If you’re not into multi-effects processors, you may want to consider using a small effects pedal. However, many of them don’t support IR file downloads. With such a device, you will have access to the IRs that have been pre-integrated by the manufacturer, but you will not be able to download your own files!
However, when talking about bowed string instruments, it is absolutely necessary to be able to download your own Impulse Response files into the pedal. These small IR pedals are called Impulse Response Loader.
Professional audio software
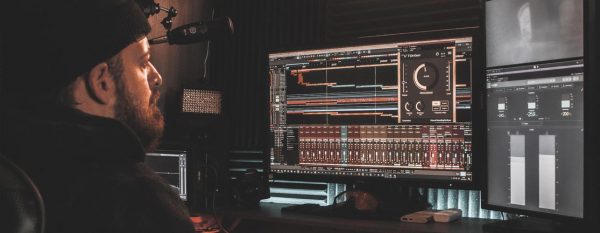
Sound engineers use Impulse Response in the studio to modify the tone of a track by changing the tone of the input microphone or amplifier, or even the acoustics of the recording room. There are endless possibilities!
Professional audio editing software, such as Pro Tools, Ableton or Cubase for example, offer Impulse Response libraries that can be downloaded and integrated into your creations.
There are also free and paid plugins that can be installed to work with these programs. The use of IR with this type of software is ideal for studio recordings.
Recording your audio track and adding your IR effect is very easy. It works just like any other plugin.
These type of software and plugins will also allow you to install your “home-made” IR files or any other compatible IR file.
How to create an Impulse Response file?
The principle
An Impulse Response can be defined as the acoustics of one or more elements that have been stored in a digital file. This small file is a sort of equalizer that you can apply to what you are playing in order to replicate the acoustics of the items stored in the IR file.
An IR file is created by using two recordings that are later compared to each other with the aim to obtain the essence of the acoustics involved. This comparison is then stored in an audio file: An Impulse Response file.
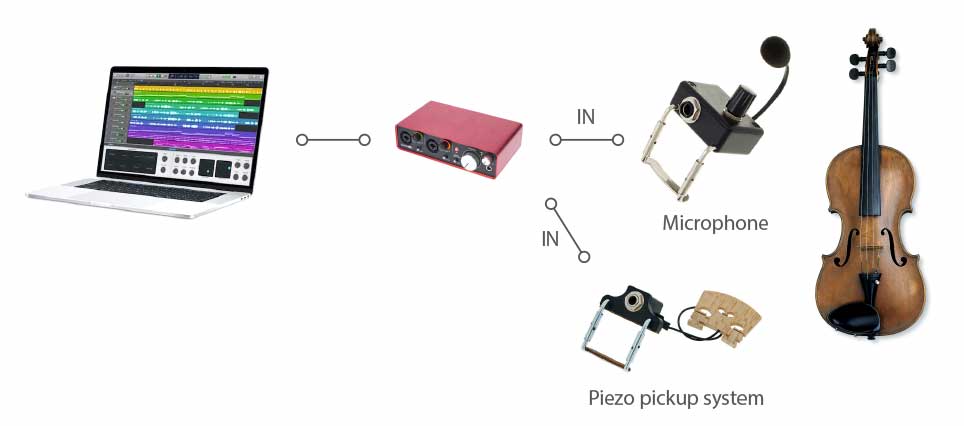
How to plug in and record a music instrument with a computer?
Create an IR of a device or a location (mic, amp, room, etc.)
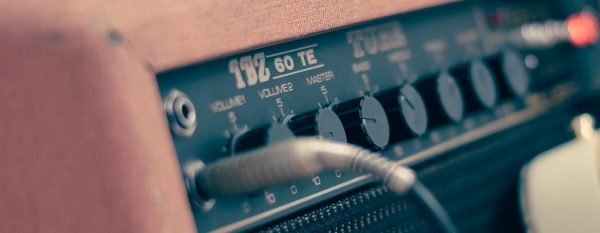
Let’s take as an example the creation of an IR file of your favorite amp. For example, you love the sound produced by your 200-watt amp, but this huge amp is not exactly the definition of “convenient” when you’re on the road. So, you prefer not to move it and only use it during rehearsals. By creating an IR file of this amp, you’ll be able to integrate it into your multi-effects processor and recreate its sound on stage without having to carry it around.
To create this Impulse Response file, you need to feed the device pink noise or a “test tone” created by a software capable of generating an IR file. The type of sound used depends on the software or the plugin you are using. Next, you have to capture the output sound by positioning a microphone in front of the amp. After that, the software will compare the sound it has sent to the sound it has received. And from this comparison an Impulse Response file will be generated. You will then be able to export it.
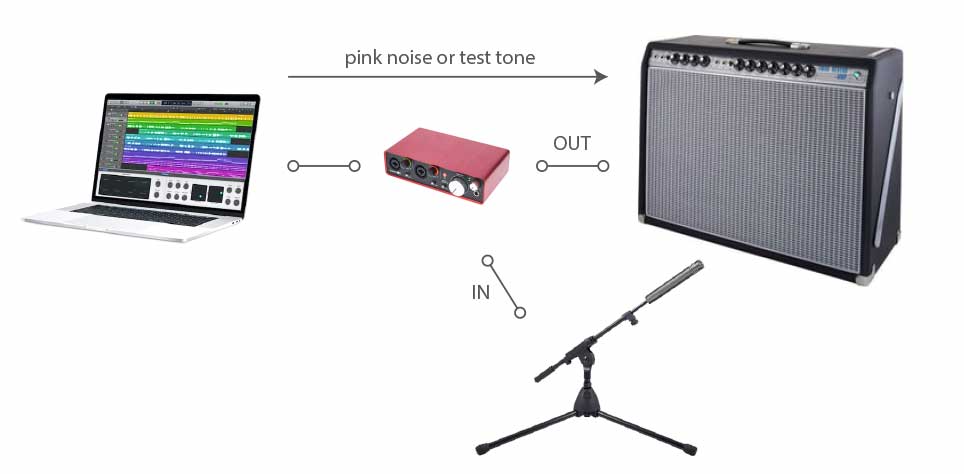
So, to summarize, you need:
- A device for which you want to generate an IR file (in our example, an amp)
- A sound card with an input and an output
- A microphone to capture the sound emerging from the amp
- A software/plugin capable of generating IR files
- Enough Jack plug cables to connect everything together
For the connections:
- Output from the sound card to the amp
- Microphone placed in front of the amp and connected to the sound card input
Pro Tools, Ableton or Logic have their own plugins to generate IR files. There are also paying or open source apps available on the Internet.
In the end, getting the IR of an amplifier or an effects chain is not really that difficult. There are dozens of YouTube videos explaining how to do it. Now let’s get down to business, creating an IR file of an acoustic instrument!
Create an Impulse Response of an acoustic instrument at home
You always need two recordings that you can compare in order to generate an Impulse Response file. In the case of acoustic instruments, these recordings must be identical and made from the instruments you wish to use later.
For example, if you want to apply a classical violin Impulse Response to your electric violin, you need to capture the sound of the classical violin with a microphone and that of the electric violin connected directly to the sound card.
Alternatively, if you want to apply a classical violin Impulse Response to the same classical violin by means of a piezo pickup system, you need to capture the sound of the classical violin with a microphone and the sound of the classical violin using the piezo pickup system.
This works with any instrument: guitar, ukulele, viola, cello, banjo, mandolin, etc. The IR files generated are determined by every parameter that can have an impact on the sound: equipment used, the room where the recording is being made, the type of microphone, etc. Let’s take a closer look at the two possibilities.
Create an IR of an acoustic instrument for an electric instrument
In the case of acoustic instruments, it is necessary to capture the sound produced by the pickup on the electric instrument and the sound produced by the sound box of the acoustic instrument. Of course, we have to take into account the path followed by the sound through the air, which is a distinctive property of these instruments!
What do you need?
- The acoustic instrument and the electric instrument
- A sound card with at least one input
- A microphone to record the acoustic instrument
- A recording software capable of generating IR files.
- The necessary cables for the connections
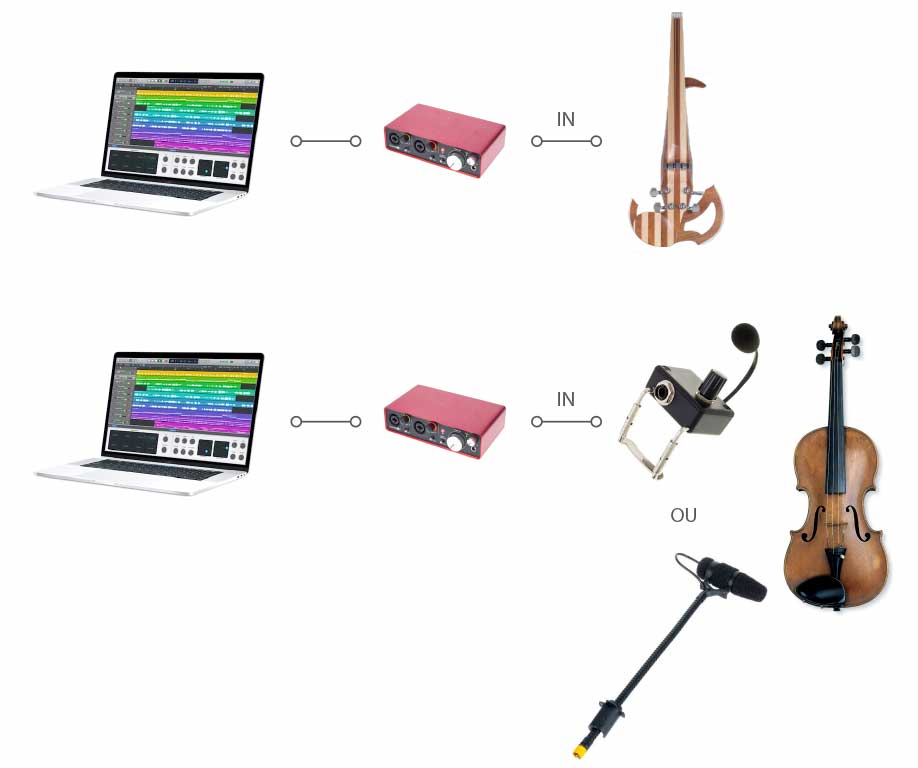
How to proceed?
We will make two separate recordings of the same piece:
- First, record the acoustic instrument with a microphone connected to the sound card
- Then, record the electric instrument by plugging it directly into the sound card
Which piece should I play?
Choose a piece that encompasses all the sound possibilities of the instrument. It is therefore advisable to play as many notes as possible. For bowed string instruments, if possible, use different bowing techniques, this is important since bowing has a great influence on the frequencies. Rehearse the piece before recording it, for you will have to play it twice: once with the acoustic instrument and once with the electric instrument. These two recordings must be similar in terms of tempo, pitch, intensity, bow pressure, etc. in order to get a good result.
Once you have exported the IR file from your acoustic instrument, import it into the device you use to play your IR files. The sound will be significantly more acoustic with the IR. However, it will not be perfect. As with any effect, it is important to improve your effects chain. As for us, we add an EQ and a bit of delay and reverb in order to achieve something that feels more natural.
Create an IR for an acoustic instrument with a piezo pickup system
In this case, we address the example detailed in paragraph 2.3. Here is the equipment you need to generate an Impulse Response:
- The acoustic instrument that will be used for the IR file
- A piezo pickup system for this instrument
- A microphone to record the acoustic instrument
- A sound card with at least two inputs
- A recording software capable of generating an IR file
- The necessary cables for the connections
How should I proceed?
A single recording of the same piece is made using two different recording systems: a microphone placed in front of the instrument and a piezo pickup system. Then the software will analyze and compare the two tracks to generate an IR file of your instrument.
As explained in the previous section, when recording, try to cover the whole sonic palette of the instrument and your own playing style. If you don’t play a double stop, the IR won’t be able to take this specific feature into account and the reproduction of this technique might end up sounding bad. The next step is to download and use the generated file with a device designed for IRs.
Below you will find a video explaining this method on an acoustic guitar.
Don’t forget to save your IRs, they can quickly be lost during a Windows/Mac system crash or an accidental delete of your effects.
Create an IR for an instrument you don’t have access to
It may be possible to try and recreate an IR of a Stradivarius using an audio track. If you find a high-quality audio file of a violinist playing a Stradivarius, and you can replicate exactly what he plays, you can compare the two tracks and generate an IR file. This can be done, but the sound quality of the recording and the overlay of your playing on the existing track must be perfect for the result to work properly! Let’s be perfectly honest, it can be done, but it’s quite complicated!
Note that this can only work if the violinist is performing solo. If the track features other instruments, it will be impossible to generate a functional IR.
Impulse Response quality and rendering
Sometimes we find that the final results of an IR file, whether homemade or purchased, are disappointing. The rendering of an Impulse Response depends on many things.
First of all, “home-made” conditions are not always ideal. All parameters involved in sound recording play a role in the final result. This ranges from the quality of your microphone to the acoustics of the room you are recording in…
Secondly, the slightest difference in tempo, sound power or accuracy between the two tracks being compared is guaranteed to cause minor problems.
Lastly, Impulse Response files that have already been created and made available on the Internet have been generated with instruments that are not your own and by another musician playing in a different style. As a result, that Impulse Response file might not perfectly match your playing style. In such a case, you may hear some crackling or other odd sounds on certain notes while playing. These are often not audible to the human ear, but can be heard in the recordings.
Where can I find professionally created IR files?
There are dozens of websites that offer IR files. A quick search on the Internet will help you find what you are looking for! They are recorded in ideal conditions, and will not fail to deliver a reasonable level of quality. You can have a look on Tones & Vibes and 3SigmaAudio.
Just make sure that the file you get is compatible with your equipment. Some manufacturers sell proprietary files. But there is no reason to be critical about this, they are just protecting all the work that has gone into producing these audio files. Producing an IR file of a Guarneri requires finding and renting a Guarneri. As you can see, this is quite expensive especially when you consider the price of this kind of instruments!
There are also effect pedals that have been specifically designed for acoustic instruments that include specific IRs. Unfortunately, they are usually designed for guitarists. There are very few files and pedals made specifically for bowed string instruments.
You can also find studios that offer to create IR files for your instruments. They ask the musicians to record the two tracks needed to create the IR file and then generate it.
Now you have everything you need to use an Impulse Response with any electric or acoustic instrument! And don’t let us ever hear you say that an electric violin can’t sound like an acoustic violin! Yes, ok, it’s not exactly the same, but still, with the help of an IR file, you can get pretty close!
Sources and images: Wikipedia, Makers of Impulse Response softwares and pedals, Hotone Audio, Matthew David Montgomery and The Pedal Guy on YouTube, Unsplash @elijahmerrellmedia and Pawel Czerwinski.


